Cincinnati’s outdoor living season stretches from spring through fall, and good outdoor lighting extends those evenings on the porch, patio, or deck by several hours. Beyond the sunset appeal, outdoor lighting in Cincinnati serves a practical purpose: it lights pathways for safety, illuminates entry points to deter unwanted visitors, and creates distinct zones in your yard for entertaining and relaxation. Whether you’re installing your first landscape lights or upgrading tired fixtures, understanding Cincinnati’s climate, style preferences, and installation basics makes the difference between a weekend project and a costly do-over.
Table of Contents
ToggleKey Takeaways
- Outdoor lighting in Cincinnati enhances safety, security, and entertainment value by extending usable outdoor space while deterring break-ins and reducing navigation hazards.
- Choose weather-resistant fixtures with IP65+ ratings and materials like aluminum, stainless steel, or powder-coated finishes to withstand Cincinnati’s humid summers, freezing winters, and variable spring/fall weather.
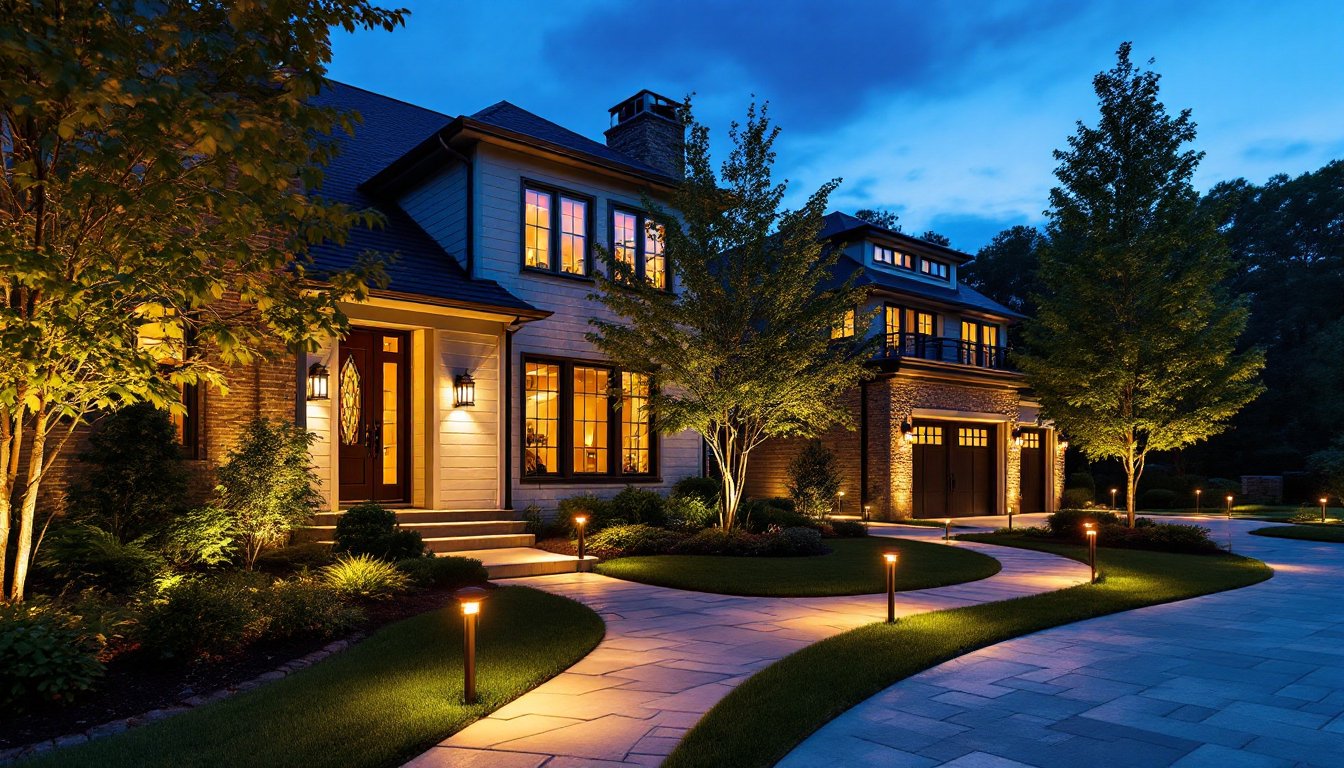
- Plan your outdoor lighting in distinct zones—entry, driveway, deck, walkway, and security areas—to balance functionality and aesthetics while avoiding over-lighting and light pollution.
- Low-voltage LED systems are ideal for DIY projects and require proper planning, a UL-rated transformer, buried cable at 6–12 inches depth, and waterproof connections sealed with silicone caulk.
- Match lighting fixtures to your home’s architectural style—lantern styles for traditional/colonial homes, geometric designs for modern homes, and transitional blends for Cincinnati’s suburban preferences.
- Maintain outdoor lighting by cleaning lenses seasonally, checking connections annually, and trimming vegetation to ensure long-term performance and avoid moisture buildup.
Why Outdoor Lighting Matters in Cincinnati
Cincinnati’s humid summers and variable spring and fall weather mean outdoor fixtures take a beating. Moisture and temperature swings accelerate rust and lens degradation on cheap or inappropriate fixtures. Good outdoor lighting isn’t just about ambiance, it’s about security and function.
Pathway lighting prevents trips and falls on uneven ground. Well-lit entry points make your home less inviting to burglars and make it easier for guests to navigate safely after dark. Task lighting over a grill, shed, or workspace makes those areas usable beyond dusk. Studies show that properties with strategic outdoor lighting experience fewer break-ins and feel safer to both residents and visitors.
Cincinnati homeowners also tend to entertain outdoors: on decks, patios, and in landscaped yards. The right lighting transforms a dark yard into an extension of your living space. Many local HOAs and neighborhoods have preferences around fixture style, so choosing lighting that complements your home’s architecture and fits Cincinnati’s aesthetic also adds curb appeal and resale value.
Popular Outdoor Lighting Styles for Cincinnati Homes
Cincinnati’s architectural palette ranges from historic Victorian homes and Italianate row houses to modern ranch and colonial revivals. Lighting styles should complement these home types rather than clash with them.
Traditional and Colonial styles dominate older neighborhoods. These homes pair well with lantern-style fixtures in black, bronze, or oil-rubbed finishes, often mounted on exterior walls flanking doors and porches. Vintage-inspired fixtures with warm 2700K color temperature (the standard for incandescent-style LED bulbs) feel authentic to the era.
Contemporary and modern homes benefit from clean-lined fixtures with geometric shapes, minimalist metalwork, and sometimes sleek stainless steel or matte finishes. Recessed ground lights, linear strip lighting under eaves, and low-profile bollard lights work well in these settings.
Transitional designs, which blend traditional bones with modern simplicity, are common in Cincinnati’s suburbs. Think classic lantern shapes but with clean proportions and materials like brushed nickel or graphite.
Pathway and Accent Lighting
Pathway lights serve dual purposes: safety and aesthetics. In Cincinnati, path lighting typically uses low-voltage LED fixtures placed 8 to 10 feet apart along walkways, driveways, and garden beds. Fixtures range from simple bollard-style posts (12 to 18 inches tall) to stake lights and in-ground well lights that cast light upward.
Accent lighting highlights landscape features, uplighting a mature tree, silhouetting a stone wall, or bathing shrubs or flower beds in warm light. Accent fixtures use narrow beam angles (30 to 40 degrees) to focus light precisely, avoiding light trespass onto neighbors’ properties and keeping your energy bills in check. Combining pathway and accent lighting creates depth and visual interest, especially if you’re working with Outdoor Home Lighting: Transform solutions that balance both function and design.
Essential Lighting Zones for Your Yard
Think of your outdoor space as a series of zones, each with different lighting needs. Zoning prevents over-lighting (which wastes energy and creates light pollution) and ensures adequate light where it matters.
Entry and threshold zones are your highest priority. Mount wall-mounted fixtures on either side of the front door, or install a ceiling-mounted fixture on a covered porch. Aim for at least 50 to 100 footcandles at the front entry for safety and visibility. For reference, a footcandle is one lumen of light falling on one square foot of surface. This brightness is enough to clearly see faces and identify visitors.
Driveway and garage zones need enough light to park safely and see obstacles. Mounting lights on the garage itself, under eaves, or on tall posts (10 to 15 feet) works best. Avoid pointing lights directly at the street, which causes glare and is often prohibited by local ordinance.
Deck and patio zones blend aesthetics with task lighting. If you’re grilling or dining, install lights overhead or on adjacent structures. For seating and lounging areas, softer ambient lighting, such as string lights or low-level fixture clusters, creates a relaxed mood. Dusk-to-dawn sensors paired with Dusk to Dawn Outdoor options can reduce energy use significantly.
Walkway and garden zones use low-voltage lighting to guide guests and showcase plantings. Spacing fixtures 8 to 10 feet apart ensures even coverage without excessive brightness.
Boundary and security zones include any dark corners, side yards, or transitions between properties. Motion-activated lights here deter intruders and eliminate dead zones on your property.
Choosing Weather-Resistant Fixtures for Ohio’s Climate
Cincinnati winters dip below freezing: summers are humid and sometimes swampy. Spring and fall bring rain, wind, and temperature swings that stress outdoor materials. Your fixtures must survive this cycle without rusting, fading, or failing after a season or two.
Material selection is critical. Aluminum and powder-coated steel resist rust better than raw iron. Stainless steel costs more but offers superior longevity. Plastic fixtures (polycarbonate or acrylic) are durable and lightweight but may yellow or become brittle over many years. Brass and copper can develop patina: if you want them to stay shiny, you’ll need to polish them occasionally.
IP ratings (Ingress Protection) indicate moisture resistance. Look for fixtures rated IP65 or higher for outdoor use. IP65 means the fixture is fully protected against dust and water jets from any direction. IP67 fixtures are submersible and suitable for poolside or areas prone to standing water.
Lens and diffuser materials matter too. Tempered glass lasts longer than plastic in UV exposure. Clear glass allows more light through than frosted or colored glass, so account for brightness loss when frosted lenses are used.
Wiring and connections must be rated for wet locations. Look for UL-listed fixtures designed for outdoor use. In Cincinnati, many homeowners choose Home Depot Outdoor Lighting: Transform for reliable, tested inventory and the option to ask staff about regional climate considerations.
Seal all junction boxes and connections with silicone caulk or waterproof connectors. Moisture is the enemy of longevity, a five-dollar connection sealed properly today beats a fifty-dollar fixture replacement next spring.
DIY Installation Tips and Best Practices
Most outdoor lighting projects fall into two categories: hard-wired (110V) and low-voltage (12V). Low-voltage systems are safer for DIYers and require no permit in most cases, though you should confirm with your local building department.
Planning and layout come first. Sketch your yard to scale on paper, noting trees, structures, walkways, and entry points. Mark where fixtures will go and measure wire runs. Low-voltage systems need a transformer (usually 100 to 600 watts) to step down household voltage to 12V. Mount the transformer on an exterior wall near an outlet, or place it in a protected location close to where your lighting run begins.
Materials checklist for a typical low-voltage system:
- Low-voltage transformer (UL-rated for outdoor use)
- Low-voltage cable (10 or 12 gauge copper, rated for burial)
- Low-voltage fixtures (path lights, deck lights, well lights, or accent fixtures)
- Wire connectors rated for outdoor/wet use
- Silicone caulk and waterproof sealant
- Photocell or timer (optional, for automatic on-off)
Safety and prep:
- Turn off the power at the breaker before installing any wiring near your house.
- Bury low-voltage cable 6 to 12 inches deep to protect it from damage and UV exposure. Use a cable burial tool or a flat shovel to create a trench. Avoid burying cable under pavement or in high-traffic areas where it may be crushed.
- Wear gloves and eye protection when handling sharp fixture edges and when installing fixtures in tight spaces.
- Test the system before burying cable. Plug in the transformer, check that all lights illuminate, and verify brightness levels.
Installation steps (low-voltage system):
- Mount the transformer on an exterior wall. Ensure the outlet is GFCI-protected. Keep the transformer away from downspouts and splash zones.
- Run low-voltage cable from the transformer along your planned route. You can lay it on top of soil initially to verify spacing and coverage before burial.
- At each fixture location, cut the cable, strip about 1 inch of insulation from each conductor, and use a waterproof connector to attach fixture leads to the main cable.
- Bury the cable gently, avoiding kinks and sharp turns. Mark the cable’s path with small flags or paint so future digging doesn’t sever it.
- Install each fixture at the proper depth (usually 2 to 4 inches for path lights) and angle (upward for accent lights, downward or horizontal for path lights).
- Once all fixtures are in place and the system is tested, seal all connections with silicone caulk or self-sealing connectors.
For hardwired (110V) fixtures, installation is more complex and often requires a licensed electrician, particularly if trenching near the house or running cable under concrete. Check Cincinnati’s building codes, many jurisdictions require a permit for outdoor 110V circuits. The code requires GFCI protection on all exterior outlets and fixtures, and cable must be in conduit when above ground or in high-traffic areas. When in doubt, hire a licensed electrician to avoid code violations and safety hazards.
Maintenance tips:
- Clean fixture lenses and diffusers in spring and fall to remove dirt, pollen, and spider webs.
- Check connections and caulk seals annually. Reseal any gaps or cracks.
- Replace bulbs proactively, an LED that fails mid-summer might spoil an evening, and Digital Trends regularly reviews smart outdoor lighting options if you want to upgrade to connected fixtures that let you control brightness and scheduling from your phone.
- Trim vegetation around fixtures to avoid blocking light and trapping moisture.
Conclusion
Good outdoor lighting in Cincinnati balances safety, style, and durability against the region’s climate challenges. Start by identifying your zones, choosing weather-resistant fixtures suited to your home’s architecture, and selecting low-voltage systems when possible to simplify installation. Take time with layout and prep work, it’s the difference between a weekend project and years of reliable outdoor lighting. Whether you’re adding a few path lights or creating a multi-zone lighting plan, thoughtful fixture selection and careful installation will keep your yard bright, safe, and inviting well into the evening.


