Outdoor lighting timers are one of those small investments that solve a genuine problem: how do you keep your yard lit on schedule without flipping switches manually every night? Whether it’s your porch lights, deck floods, or pathway fixtures, a timer ensures consistent operation and saves electricity when you’re away. They also add security, nothing says “someone’s home” quite like lights on a predictable schedule. This guide covers what outdoor lighting timers actually do, the main types available today, and how to pick the right one for your setup. We’ll also walk through basic installation so you can wire one up without a licensed electrician in most cases (though structural changes or heavy loads may require a pro).
Table of Contents
ToggleKey Takeaways
- Outdoor lighting timers automatically control when your lights turn on and off, providing convenience, enhanced security, and significant energy savings without manual intervention.
- Three main types exist: mechanical timers (simple and budget-friendly at $15–$40), digital timers (precise with battery backup, $25–$100), and smart WiFi-enabled timers (remote control via phone, $30–$70).
- Verify your outdoor lighting timer’s weatherproofing rating (at least IP44 for splash-proof protection) and load capacity (typically 15 amps/1,800 watts for most residential setups) before purchase.
- Plug-in timer installation is a straightforward DIY project requiring just an outlet and a few minutes, while hardwired systems demand electrical knowledge and may require permits or a licensed electrician.
- Plan your outdoor lighting timer into a broader outdoor lighting strategy from the start, accounting for weatherproofing, mounting options, and backup power to avoid installation issues and maximize long-term performance.
What Are Outdoor Lighting Timers and Why You Need One
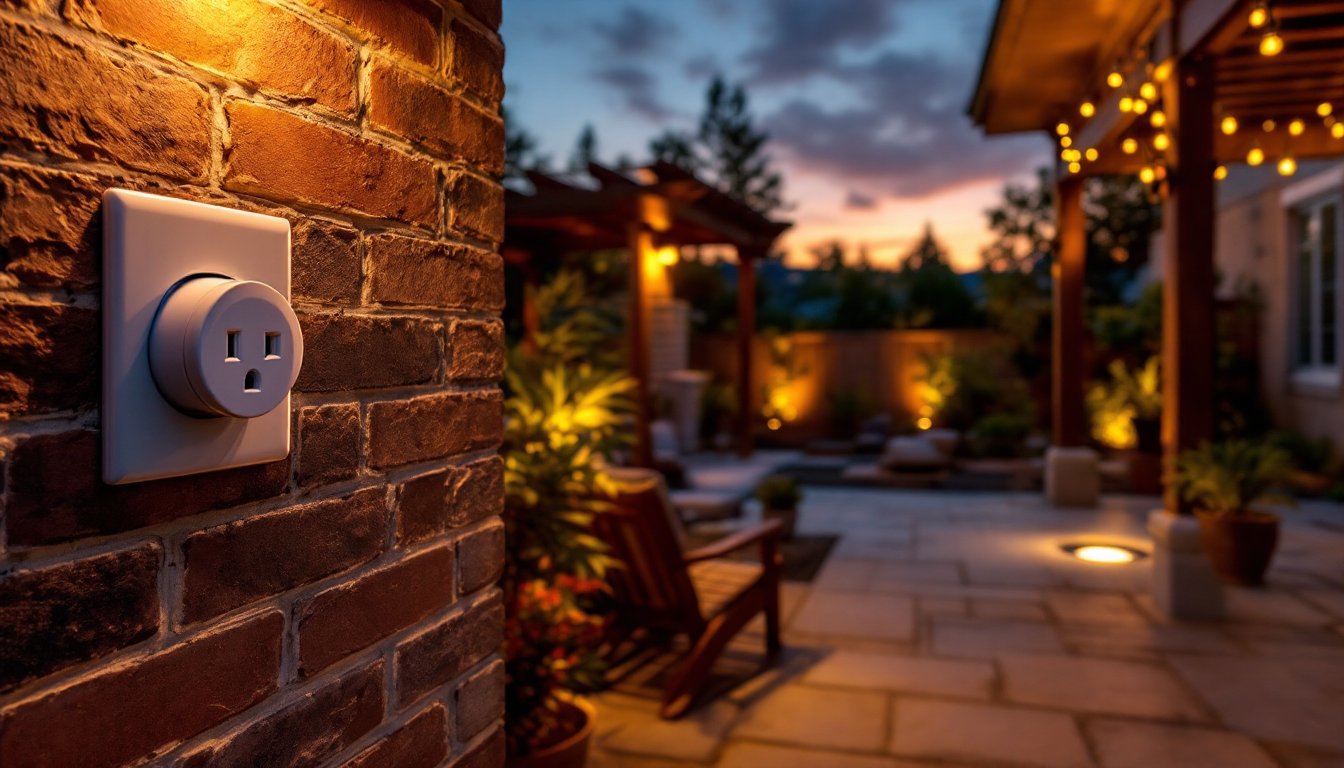
An outdoor lighting timer is a device that automatically switches lights on and off at preset times. It sits between your light fixture (or outlet) and your power source, either hardwired into a circuit or plugged into an existing outlet. The timer controls the power flow, turning electricity to your lights on at dusk and off at dawn, or whenever you set it.
Why bother? Three main reasons. First, convenience: you don’t manually flip switches. Second, security: lights on a timer deter would-be intruders far better than a dark house, especially when you’re traveling. Third, energy savings: no more forgetting to turn lights off at 2 a.m., and you’re not lighting an empty yard at noon. Most timers use minimal power themselves, only a few watts, so the payback is real over time.
Outdoor timers work in wet conditions (they’re rated IP44 or higher, meaning splash-proof or weatherproof depending on model), so they’re safe for gardens, patios, and entryways. Unlike indoor timers, outdoor units have heavier-duty casings and corrosion-resistant components because they face rain, UV exposure, and temperature swings.
If you’ve ever worried about leaving your house dark during a vacation or tired of flipping porch switches twice daily, a timer eliminates both headaches. It’s one of the easiest outdoor upgrades a homeowner can install.
Types of Outdoor Lighting Timers
Mechanical Timers
Mechanical timers use a rotating dial or pins to control on/off cycles. You push or insert pins into a 24-hour (or 7-day) wheel, and when the dial rotates to a pin, power cuts or restores. They’re the simplest, cheapest option, typically $15–$40, and require zero batteries, no Wi-Fi, and no smartphone. Just plug it in or wire it in, set your pins, and go.
The trade-off? They’re not precise. Mechanical timers click on/off at the pin intervals, usually 15- or 30-minute blocks. If you need the light on at exactly 6:47 p.m., a mechanical timer won’t do it. Also, they have no backup memory if power drops, so you’ll reset after an outage. They work best for simple on-off schedules: lights on at dusk, off at dawn, or garden lights on at 6 p.m. and off at 10 p.m. Reliable, dumb, and effective.
Digital and Smart Timers
Digital timers offer more precision. They use quartz clocks and often have battery backup (usually a single AA or AAA battery). You program exact on/off times, say, 6:30 a.m. and 9:15 p.m., using buttons or a small LCD screen. Price runs $25–$100. They’re weatherproof, compact, and handle multiple daily cycles. Some are 7-day programmable, so you can set different schedules for weekdays and weekends.
Smart timers (also called WiFi-enabled or connected timers) take it further. They connect to your home network via 2.4 GHz WiFi and let you control them from your phone, anywhere. Many integrate with voice assistants (Alexa, Google Home) and let you check status in real time. Some even learn sunrise/sunset times automatically for your location. Popular choices like smart outlets with timer functions run $30–$70. The catch? They need reliable WiFi (outdoor signal range can be spotty), and they’re more complex to set up initially.
Recent reviews of outdoor smart plugs highlight models that function as both timers and general-purpose outlets, giving you more flexibility. If you’re building a smart home lighting setup, smart timers fit naturally into that ecosystem.
Key Features to Look For
Weatherproofing Rating (IP Code): Look for at least IP44 (splash-proof). If your timer is directly exposed to rain or spray (like on a patio column), aim for IP65 (jet-spray proof). The IP rating is usually printed on the box or manual.
Load Capacity: This is critical. Check the amp/watt rating on the timer and compare it to your light load. Most outdoor timers handle 15 amps (1,800 watts) at 120V, which covers most residential outdoor lights. If you’re running multiple floods or LED strips, add up the wattages, a 150-watt flood plus a 50-watt pathway light equals 200 watts total, well within typical limits. If you exceed the timer’s rating, it can overheat or fail. For heavy loads, use a contactor (a heavy-duty relay) instead, but that typically requires a licensed electrician.
Outlet vs. Hardwired: Plug-in timers are fastest to install and don’t require any wiring knowledge. Hardwired timers must be wired into your home’s electrical circuit, which is faster than running a long cord but requires basic comfort with a breaker panel and wire nuts. Most homeowners prefer plug-in for single fixtures or a small group of lights.
Backup Power: Mechanical timers have none: digital units usually have a battery that keeps time during a power outage. Smart timers sync back to the network once power returns. If you’re in an area with frequent outages, a battery-backed digital timer is worth the extra $10–$15.
Programming Flexibility: How many on/off cycles per day? Can you set different schedules for different days? For simple dusk-to-dawn setups, a basic mechanical timer works. For complex schedules (outdoor restaurant or security lighting), smart timers or multi-cycle digital units make sense. Reviews of outdoor light timers for security and seasonal use often highlight models with flexible programming.
Mounting Options: Some timers are designed to go directly in an outdoor outlet box (recessed into the wall). Others mount on top of an outlet. Check your outdoor electrical setup before buying. If you don’t have an existing outlet, you’ll need to run a circuit, which is a licensed job in most jurisdictions.
Installation Tips for DIY Homeowners
Before You Start: Check local building codes. In most areas, adding a plug-in timer to an existing outlet is fine: hardwiring one into a circuit may require a permit and inspection. Call your local building department if you’re unsure.
For Plug-In Timers (the easiest route):
- Locate a weatherproof outdoor outlet within reach of your light fixture or use a power cord designed for outdoor use (usually 12 or 14 AWG gauge, rated for wet locations).
- Plug the timer into the outlet.
- Plug your light fixture or an outdoor extension cord into the timer.
- Set the timer (mechanical: insert pins: digital: program with buttons: smart: download the app and connect to WiFi).
- Test by manually triggering it (most timers have a manual override button) to confirm the light switches on and off.
Wear safety glasses if you’re working around electrical components. If the outlet has a GFCI (ground-fault circuit interrupter, you’ll see a “Test” and “Reset” button), press Reset after plugging in the timer. GFCI outlets are mandatory in damp outdoor locations and protect against shocks.
For Hardwired Installation (more permanent, but requires confidence):
- Turn off power at the breaker panel and verify the circuit is de-energized using a non-contact voltage tester (about $10).
- Run 14 AWG or 12 AWG wire (depending on the circuit amperage) from your breaker panel to the timer location. This typically requires running wire through conduit or in existing walls. If you’re cutting into walls, you’re venturing into territory that may require a permit and/or a licensed electrician, especially near load-bearing studs or if it crosses other utilities.
- Connect the timer according to the wiring diagram (usually included). Typically, hot (black) goes to one screw, neutral (white) to another, and ground (bare copper) to the green screw or a grounding terminal.
- Use wire nuts (twist connectors) to join any field connections, and wrap them with electrical tape for extra security.
- Test with a voltage tester before closing up the box.
- Restore power and program the timer.
If any of this sounds unfamiliar, stop and hire a licensed electrician. Electrical work done wrong can cause fires or shocks. It’s not worth a DIY trophy.
Common Pitfalls: Forgetting to account for the timer’s own power draw (usually under 1 watt, but it adds up if you have many). Not keeping the timer dry inside its enclosure, moisture and electronics don’t mix. Running a cord across a walkway where people trip on it (a safety hazard and a fire risk if the cord is damaged). Starting a hardwired circuit with an undersized breaker for the wire gauge (e.g., 15-amp breaker on 12 AWG wire demands a 20-amp breaker). Planning outdoor timers into a wider outdoor home lighting strategy from the start saves headaches later.
After Installation: Check your timer after a heavy rain or during winter to make sure it’s functioning and not corroded. Replace batteries annually if it’s a digital timer with battery backup. Smart timers may lose connection in winter if outdoor WiFi signal weakens due to ice or snow on your router antenna, place the router in a central location if possible.
Conclusion
Outdoor lighting timers are simple devices with real payoffs: security, convenience, and lower electric bills. Start by deciding between mechanical (cheap, simple, no batteries), digital (precise, battery-backed), or smart (flexible, remote control). Pick one that matches your load, weatherproofing needs, and electrical setup. Most plug-in installations take under an hour: hardwiring takes longer and may need a pro. Properly installed, a timer turns your outdoor lighting from a daily chore into a set-and-forget system that keeps your yard safe and inviting, day after day.


