Commercial pendant lighting fixtures have become a staple in modern homes, kitchens, dining areas, and workspaces. Unlike basic ceiling lights, pendant fixtures hang from the ceiling on a cord, chain, or rod, bringing both task lighting and style to any room. Whether you’re renovating a kitchen island, upgrading a home office, or adding accent lighting to a dining room, understanding commercial pendant lighting fixtures helps you make informed choices. This guide walks you through styles, installation considerations, and practical tips so you can transform your space with confidence.
Table of Contents
ToggleKey Takeaways
- Commercial pendant lighting fixtures provide durability, task lighting, and aesthetic appeal by hanging from the ceiling on cords, chains, or rods, making them ideal for kitchens, dining areas, and workspaces.
- Proper installation requires measuring ceiling height (30–36 inches above work surfaces for islands, 12–15 inches above dining tables), confirming hardwired electrical boxes, and checking bulb compatibility with dimmable LED options.
- Popular commercial pendant styles include industrial fixtures with exposed elements, minimalist geometric designs, and contemporary decorative options that suit various modern décor themes.
- Most homeowners can successfully install pendant lighting by turning off power, disconnecting existing fixtures, connecting wires (ground to ground, white to white, black to black), and securing the mounting bracket to the rough-in box.
- LED bulbs offer 80% energy savings over incandescent alternatives while providing consistent performance, though all LEDs must be verified for dimmer switch compatibility.
- For complex electrical work like running new circuits or adding junction boxes, hiring a licensed electrician ($150–$300 in labor) ensures code compliance and safety rather than risking installation errors.
What Are Commercial Pendant Lights and Why They Matter
Commercial pendant lights are individual or multi-unit fixtures suspended from the ceiling by cord, chain, or rod. Unlike traditional flush-mount or semi-flush fixtures, pendants hang lower into the room, making them ideal for task lighting over work surfaces. The key difference from residential lights is that commercial-grade pendants are built for durability, frequent use, and meeting electrical codes in high-traffic areas.
Why upgrade to commercial-grade? These fixtures are engineered for consistent performance, often with better heat dissipation and sturdier hardware than decorative-only options. They handle dimming controls, switch on and off thousands of times without failure, and typically carry certifications proving they meet electrical safety standards. In a home setting, this means your kitchen pendant over an island will last through years of daily use without dimming sockets or loose connections.
Pendant lighting solves three problems at once: it provides localized light where you need it most, eliminates awkward shadows that downlights create, and anchors a room’s design aesthetic. When positioned correctly, pendants can make a modest space feel intentional and well-planned, not just adequately lit.
Popular Styles and Designs for Modern Spaces
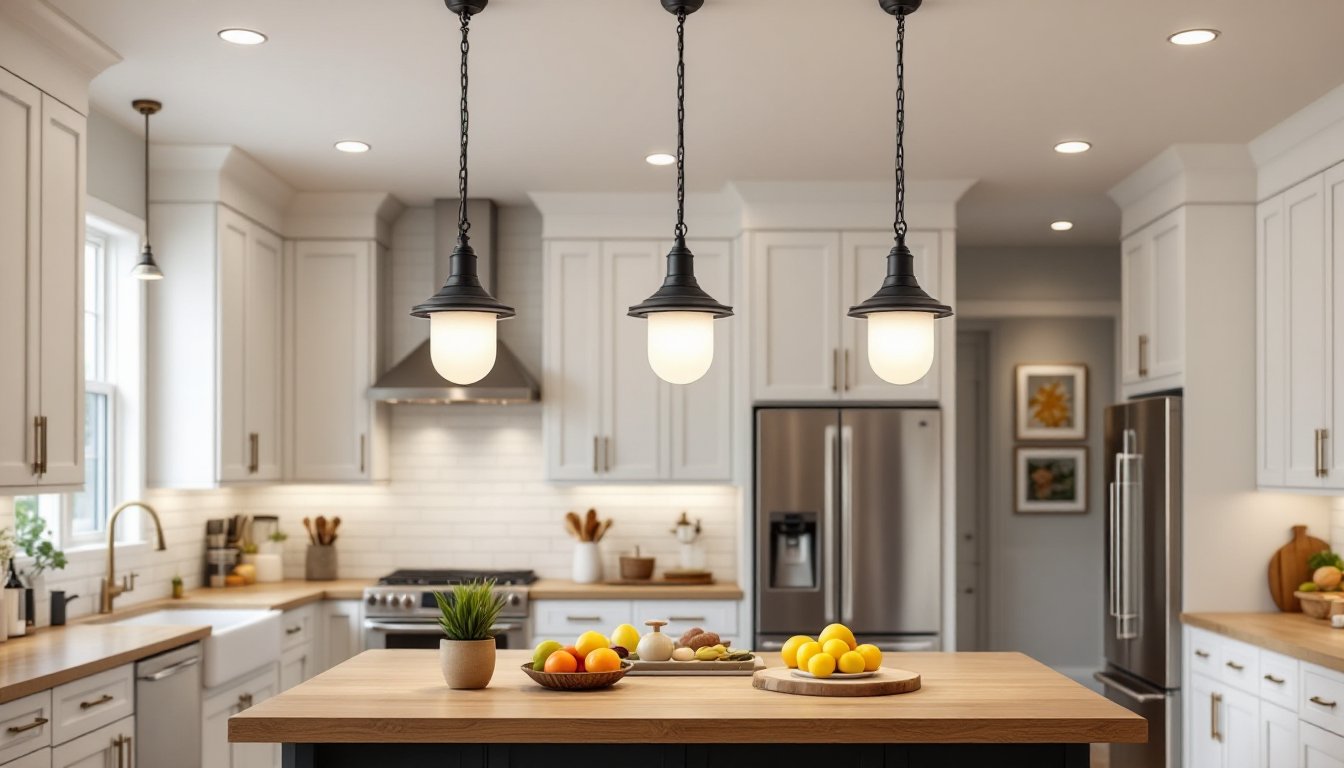
Industrial and Minimalist Options
Industrial pendant fixtures feature exposed elements, bare Edison bulbs, metal cages, or steel stems, celebrating the raw structure rather than hiding it. These fixtures work especially well in open-concept kitchens, lofts, or modern farmhouse settings. Look for fixtures with solid brass, matte black, or brushed nickel finishes that resist fingerprints and aging gracefully.
Minimalist pendants strip away decoration entirely, offering simple geometric shapes: cylinders, spheres, or cones in neutral colors. A matte white or concrete finish pendant paired with modern cabinetry feels clean and contemporary. Both styles integrate well with modern lighting schemes that emphasize function over ornamentation.
When choosing industrial or minimalist fixtures, check the bulb type compatibility, many older designs use A19 incandescent bulbs, but modern versions often support LED equivalents that save energy. Confirm the fixture accepts dimmable LEDs if you want variable brightness.
Contemporary and Decorative Choices
Contemporary pendants blend function with sculptural form: twisted glass, fabric shades, or layered metal details. These fixtures suit spaces that need personality without jarring contrast, think mid-century kitchens or eclectic dining rooms. Frosted or colored glass adds visual interest while diffusing light evenly.
Decorative pendants lean into statement-making: bold colors, artistic glass work, or unusual shapes. A single oversized pendant above a console table or three pendants in a row over a bar create focal points. Designers often recommend varying the drop height between 30–36 inches below cabinet bottom for islands and 12–15 inches above a dining table surface to balance proportion.
For inspiration on contemporary fixture styles, explore Houzz and Dwell, where you can filter by commercial pendant styles and see real installations. Many commercial suppliers like Remodelista showcase versatile options bridging residential and commercial aesthetics.
Key Factors to Consider Before Buying
Ceiling Height and Room Proportions
Measure your ceiling height and the width of the area under which you’ll hang the pendant. A 9-foot ceiling works well with a 12–18 inch drop: 10-foot ceilings allow 24–30 inch drops without feeling cramped. For islands, pendants should hang roughly 36 inches above the work surface. If you’re unsure, mock up the positioning with tape or string first.
Electrical Considerations
Before purchasing, confirm your space has a hardwired electrical box above the planned location, pendant fixtures require 120-volt household current or 277-volt commercial wiring (less common in homes). If you’re replacing an existing flush-mount light, the rough-in box is already there. If adding a new pendant, you’ll need to run wiring through the ceiling or walls, which often requires a licensed electrician and possibly a permit. Some jurisdictions follow the National Electrical Code (NEC), which mandates minimum clearances, junction box placement, and proper grounding.
Bulb Type and Wattage
Check the fixture’s maximum wattage rating (usually printed on a label inside the fixture). LED replacements are standard now, offering 80% energy savings over incandescent. Verify the fixture accepts dimmable LEDs if you want dimmer switches, not all LEDs play nicely with older dimmers. Count how many bulbs the fixture holds: a single pendant above an island might use one 12–15 watt LED, while a three-pendant set might split 36 watts total.
Finish and Material Durability
Brushed metals (brass, steel, nickel) hide fingerprints better than polished finishes. Ceramic or frosted glass shades diffuse light more evenly than clear glass, reducing glare. In kitchens or bathrooms with humidity, avoid untreated iron or bare copper, opt for powder-coated or anodized options instead.
Hanging System
Pendants come with cord, chain, or rigid rod suspensions. Cord hangs are simplest and most adjustable: you can easily cut a cord to your desired drop height. Chains offer visual interest but require precise links if you need exact height. Rigid rods look cleaner but harder to adjust post-install. Many commercial fixtures use a canopy or mounting plate at the ceiling that covers the rough-in box and distributes weight evenly, ensure yours fits your existing box.
Installation Tips for Homeowners and DIY Enthusiasts
Before You Start
Turn off power at the breaker for the circuit serving your existing fixture. Use a voltage tester to confirm power is off, don’t skip this step. Gather wire strippers, wire connectors, a screwdriver set, a voltage tester, safety glasses, and heavy-duty work gloves. If you’re installing into drywall without an existing box, this project moves into “hire a licensed electrician” territory due to code requirements.
Removing the Old Fixture
Disconnect the ground wire (usually bare copper or green), neutral (white), and hot (black or red) wires by unscrewing wire connectors. Unbolt the fixture’s mounting bracket from the ceiling box. Keep the drywall support ring or rough-in box intact, this is your anchor point for the new fixture.
Installing the New Pendant
Most commercial pendants ship with a canopy, mounting bracket, and suspension hardware. Screw the bracket into the rough-in box using the provided hardware: this is a critical anchor point and must be tight. Connect wires in this order: ground to ground, white to white, black to black, tightening each wire connector by hand until you can’t twist it further. Fold wires carefully into the box (don’t crimp or kink them), then push the canopy up and secure it with the mounting ring.
If you’re hanging the pendant on a cord or chain, measure the desired drop length from ceiling to fixture bottom. Cut cord carefully with a utility knife, then thread it through the canopy before connecting wires, this avoids re-opening the canopy later. Knot the cord above the canopy so it bears the weight, not the electrical connections.
Adjusting Height
Don’t exceed the fixture’s rated weight limit. If hanging multiple pendants, use the same suspension type and length for visual balance. A 2–3 inch variance between adjacent pendants reads as intentional asymmetry: a 6-inch gap looks like an installation error. Level is less critical unless the fixture is obviously tilted.
Final Check
Restore power and test the fixture. If it doesn’t light, turn power off immediately, recheck all wire connections, and confirm the bulb is seated and compatible. Flickering often signals a loose connection or incompatible LED. Many DIYers benefit from consulting home improvement lighting guides or Home Depot’s lighting resources before tackling the install, especially on their first pendant project.
When to Call a Professional
If you’re running new circuit wiring, adding a junction box, dimmer switch installation, or working in an older home where wiring is uncertain, hire a licensed electrician. This costs $150–$300 in labor but ensures code compliance and safety. It’s not a failure, it’s the difference between a 2-hour DIY job and a 2-week electrical project that could void insurance.
Conclusion
Commercial pendant lighting fixtures blend durability, style, and functionality in ways basic ceiling lights simply can’t match. Start by measuring your space, understanding your electrical setup, and choosing a style that complements your décor. Whether you opt for sleek minimalist pendants, statement-making decorative designs, or industrial fixtures, proper installation makes all the difference. For straightforward replacements in existing boxes, most homeowners can handle the work with basic tools and safety precautions. When in doubt, consulting a licensed electrician ensures your new pendants light up safely for years to come.


