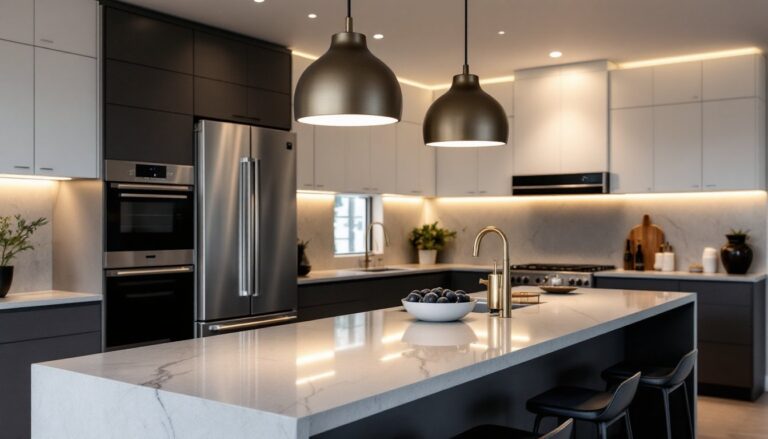
Pendant lamps have become indispensable in modern kitchens, blending task lighting with decorative appeal in ways that ceiling fixtures alone simply can’t match. Whether you’re working above a kitchen island, illuminating a sink area, or defining zones in an open-plan layout, pendant lamps deliver focused light exactly where you need it while adding genuine visual interest. Unlike recessed lights that wash a space in flat, shadow-prone illumination, pendant lamps sit at human eye level and create warm pools of light that feel inviting rather than industrial. This guide walks you through selecting, sizing, positioning, and installing pendant lamps that work for both your kitchen’s function and your personal style.
Table of Contents
ToggleKey Takeaways
- Pendant lamps for kitchen islands solve the problem of harsh overhead lighting by providing focused task light at human eye level while adding decorative appeal.
- Position pendant lamps 30–36 inches above countertops with 1–3 fixtures depending on island length, spaced 24–30 inches apart center-to-center for balanced illumination without glare.
- Choose pendant sizes roughly one-fifth to one-sixth of your island’s length, and aim for 50 lumens per square foot of work surface combined with other lighting sources.
- Pendant lamp style—whether modern, farmhouse, industrial, or coastal—should match your kitchen’s finish family (warm metals like brass or cool tones like matte black) for visual harmony.
- Install pendant lamps on dimmers with LED bulbs to shift seamlessly between intense task lighting during cooking and softer ambient light for entertaining.
- Always verify ceiling box capacity and follow manufacturer mounting instructions precisely; when new circuits or hard-wiring is needed, hire a licensed electrician to ensure code compliance and safety.
Why Pendant Lamps Are The Perfect Kitchen Lighting Solution
Pendant lamps solve a problem most kitchens face: overhead lighting that either casts harsh shadows or forces you to work in your own shade. A single recessed can light in the ceiling is no match for someone prepping food at an island or washing dishes. Pendant lamps, suspended 30–36 inches above a counter, place light directly where your hands and cutting board are.
They also work harder than task lights alone. When paired with a dimmer, pendants shift seamlessly between focused work light and softer ambient lighting for evening entertaining. In open-plan kitchens, pendant lamps above an island visually define the space without walls, signaling “this is the kitchen,” while maintaining sightlines across the room. Unlike under-cabinet strips or recessed ceiling arrays that feel utilitarian, pendant lamps function as genuine décor, they’re a statement piece you choose because you like how they look, not just because you need light. Finally, suspending fixtures from the ceiling uses zero counter or floor space, a critical advantage in kitchens where every inch matters.
Pendant Lamp Styles And Materials To Match Your Kitchen Aesthetic
Pendant style sets the visual tone of your entire kitchen. Modern and minimal pendants feature clean-lined metal or glass shades in matte black, white, or brushed brass, they disappear into a contemporary space and let the kitchen’s architecture shine. Transitional pendants bridge traditional and modern with soft geometric shapes, mixed metal finishes, and fabric or opal glass shades that feel approachable without being fussy.
Farmhouse and rustic kitchens call for wood bases, wrought iron, seeded glass, and lantern-inspired shapes that nod to vintage hardware stores. Industrial pendants embrace exposed bulbs, metal cages, and dark metals, they’re unapologetic about showing their structure. Coastal and boho styles lean into rattan, wicker, woven fiber shades, and light woods that echo natural materials: but, avoid these in kitchens with heavy cooking oils, frequent frying, or poor ventilation, as grease accumulation will dull the aesthetics and degrade woven materials.
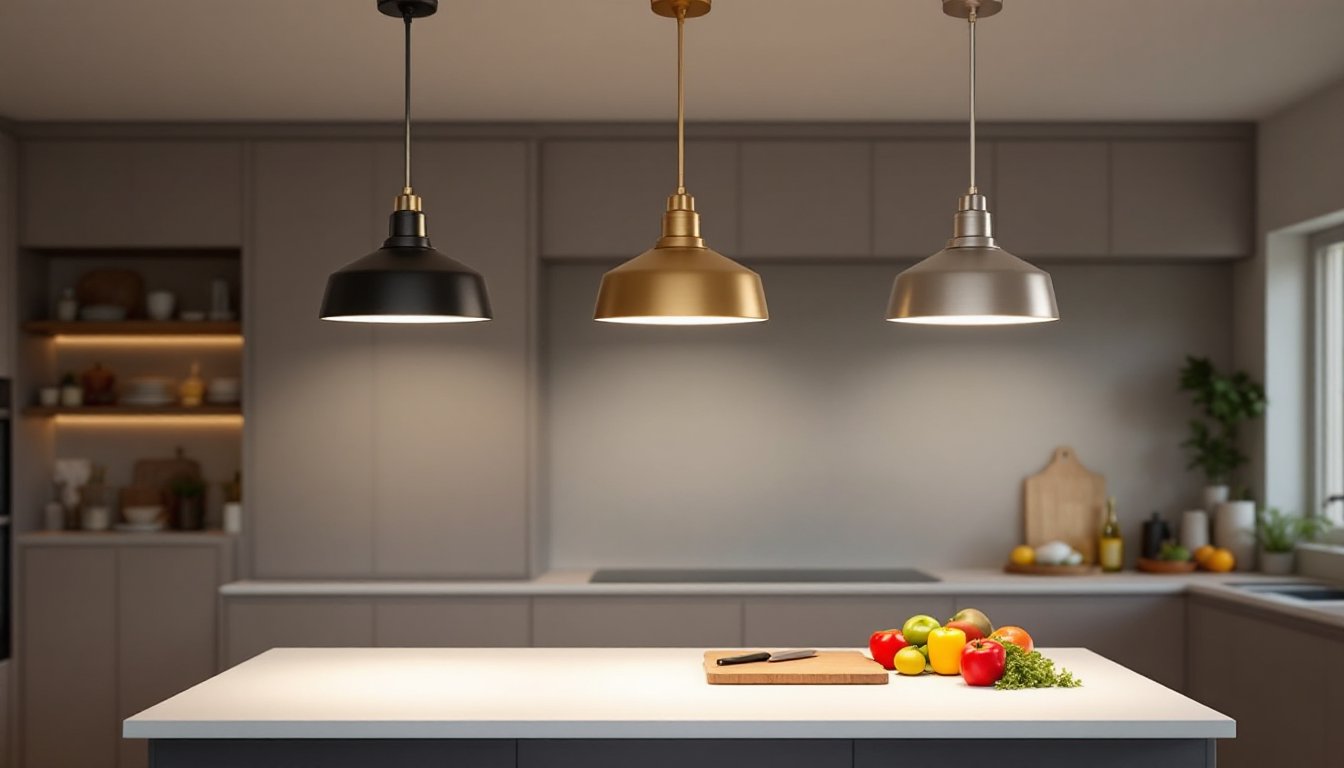
Your kitchen island lighting choice should echo your kitchen’s overall finish family, if your faucet and hardware run warm (brass, copper, bronze), lean your pendants that direction. If you prefer cool tones (chrome, nickel, matte black), match there. Exact matches aren’t required, but visual harmony matters.
Popular Materials And Finishes
Glass shades, clear, frosted, opal, or seeded, transmit maximum light and suit most styles. Metal shades in black, bronze, or brass give definition and focus light downward. Fabric shades soften light but demand good ventilation and aren’t ideal near cooking zones. Concrete and ceramic shades bring sculptural texture. Finishes include polished nickel (bright and formal), brushed nickel (softer), matte black (contemporary), brass in brushed or satin (warm and forgiving), and oil-rubbed bronze (traditional). The finish you choose does more visual work than the shape itself, changing your pendant finish from chrome to brass transforms the entire kitchen’s warmth.
Placement And Height Guidelines For Kitchen Pendant Lamps
Proper placement is half the battle. Over a kitchen island, position 1–3 pendants depending on island length. A small island (36–42 inches) typically gets one: a medium island (48–60 inches) gets two: a long island (72+ inches) gets three. Space them 24–30 inches apart from center to center, adjusted based on shade diameter so they look balanced rather than bunched or scattered.
End clearance matters: keep pendants at least 18–24 inches from the short ends of the island so someone sitting on a stool can lean back without bumping their head. Hang them 30–36 inches above the countertop, this height minimizes glare, prevents sightline blockage across the kitchen, and feels proportional to human scale. Too high (48+ inches), and you lose task-lighting impact: too low (under 24 inches), and you create shadows on faces and invite head bumps.
If installing pendants over a sink, center one unit above the sink bowl and follow similar height guidelines. Avoid blocking views to windows or creating a visual obstruction in an open layout. Run a centerline on your island with pencil or chalk before cutting any ceiling holes, this prevents costly repositioning. Double-check that your ceiling box locations align with the island’s final position: islands occasionally shift during kitchen remodels, and a misaligned fixture looks amateurish.
Choosing The Right Size And Brightness For Your Space
Pendant size isn’t arbitrary. A rough rule of thumb: pendant diameter should be roughly one-fifth to one-sixth of the island’s length. A 48-inch island pairs well with 10–12-inch pendants: a 72-inch island can handle 12–16-inch shades or even 18–24-inch statement pieces if the ceiling height is 9 feet or more. Too small, and pendants look like afterthoughts: too large, and they visually dominate and block views across the room.
Brightness is measured in lumens, and the target depends on the pendant’s role. For task lighting over islands and prep zones, aim for roughly 50 lumens per square foot of work surface, combined with any other nearby lighting (under-cabinet strips, recessed fixtures). A typical 48-inch island (roughly 20 square feet) would benefit from a combined 1,000 lumens from all sources above it. This doesn’t mean each pendant must deliver 500 lumens: modern LED bulbs (which you should always use) deliver 75–100+ lumens at just 8–12 watts. Open-bottom or clear/opal glass shades transmit more light downward than enclosed metal shades, so prioritize that if task lighting is your focus.
Install pendants on dimmers whenever possible. Dimming lets you shift from intense prep-zone lighting during cooking to softer ambient light during dinner or entertaining. Many homes treat ceiling recessed lights as the primary ambient source and pendants as flexible task support, dimmers make this flexibility real. Specify dimmable LED bulbs when you purchase: not all LEDs dim smoothly.
Installation Tips For Homeowners And DIY Enthusiasts
Before picking up a drill, confirm you’re comfortable with basic electrical work. If new wiring is required, your local code likely mandates a licensed electrician. If you’re hanging a fixture on an existing circuit, many DIYers can manage it, but do not skip safety.
Turn off power at the breaker and verify with a voltage tester (non-contact testers cost $10–20) before touching any wires. Use a properly rated ceiling box secured to framing (joists or a cross-brace between joists). The box must support the fixture’s weight: pendant fixtures typically weigh 2–5 pounds, well within standard box ratings, but heavy statement pieces (12+ pounds) need reinforced boxes. Confirm your junction box is rated for the fixture’s listed weight, this is printed on the fixture’s specification sheet.
Follow the manufacturer’s mounting instructions precisely. Adjust the stem or chain length to achieve your target 30–36 inches above the countertop before wiring, moving a chain link afterward is possible but tedious. Inside the ceiling box, all wire connections must be made with wire connectors rated for the wire gauge: standard connector sizes are clearly marked. Match hot to hot (black to black, or red to black in 240V circuits), neutral to neutral (white to white), and ground to ground (bare copper or green to bare copper or green). The ground wire is critical, it’s your safety net if there’s a fault.
For islands, confirm that your ceiling box location sits along the centerline of the island’s final position. Islands are sometimes moved during renovation, and a misaligned fixture is a permanent mistake. Run a chalk line or snap a string across your island’s centerline before drilling.
When in doubt, consult your local Master Kitchen Lighting guide. If new circuits, hard-wiring, or code compliance questions arise, hire a licensed electrician, it’s money well spent on work that runs behind walls and in ceilings for decades. Codes vary by jurisdiction: what’s acceptable in one county may not be in another.
Conclusion
Pendant lamps deliver task light, ambient flexibility, visual definition, and genuine style in a single fixture. By matching your kitchen’s aesthetic, sizing appropriately for your island, following standard spacing and height guidelines, and respecting electrical safety during installation, you’ll end up with lighting that looks intentional and functions reliably for years. Whether you’re a DIY veteran or calling in a professional for the electrical work, pendant lamps remain one of the highest-impact upgrades a kitchen can receive.